| Note: This tutorial pretends to use the INDIGO ROS distribuition, make sure you have it installed in your system.. |
| |
Getting Started with the Velodyne VLP16
Description: Using the Velodyne stack to connect to and display data from a Velodyne VLP16Keywords: Velodyne, VLP16, LIDAR, point cloud, Rviz, Installation.
Tutorial Level: BEGINNER
Next Tutorial: Getting Started with the Velodyne HDL-32E
Contents
Before starting this tutorial, please complete installation as described in the ROS installation instructions. This tutorial assumes that Ubuntu is being used. Otherwise, check out and install the code manually from the source control repository
Setting up your computer to communicate with the Velodyne sensor
- Power the LIDAR via the included adapter
- Connect the LIDAR to an Ethernet port on your computer.
For now, disable the WiFi connection on your computer.
Configure your computer’s IP address through the Gnome interface
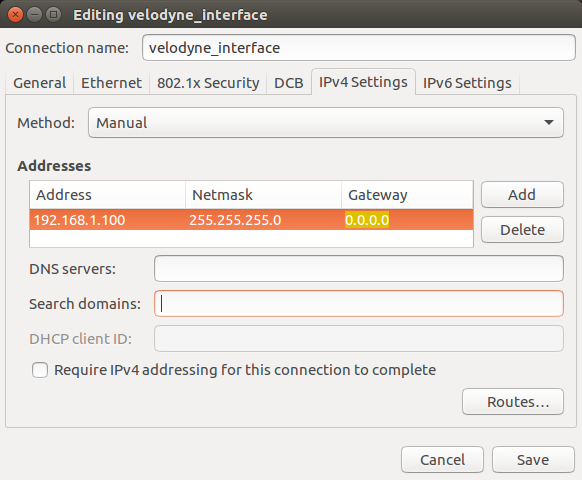
- Access the Gnome Menu (Super key), type "Networks Connections" then run it. Select the connection's name and click on "edit". Choose the IPV4 Settings tab and change the “Method” field to "Manual".
- Click on "add" and set the IP address field to 192.168.1.100 (“100” can be any number except in a range between 1 and 254, except 201).
- Set the “Netmask” to 255.255.255 and the "Gateway" to 0.0.0.0.
- To finish it click on "save".

Connecting your computer to LIDAR through terminal
Power the LIDAR via the included adapter Connect the LIDAR to an Ethernet port on your computer. Statically assign an IP to this port in the 192.168.3.x range.
sudo ifconfig eth0 192.168.3.100
Add a static route to the LIDAR's IP address. The IP address can be found on the CD case which was included with the LIDAR.
sudo route add 192.168.XX.YY eth0
Checking the configurations
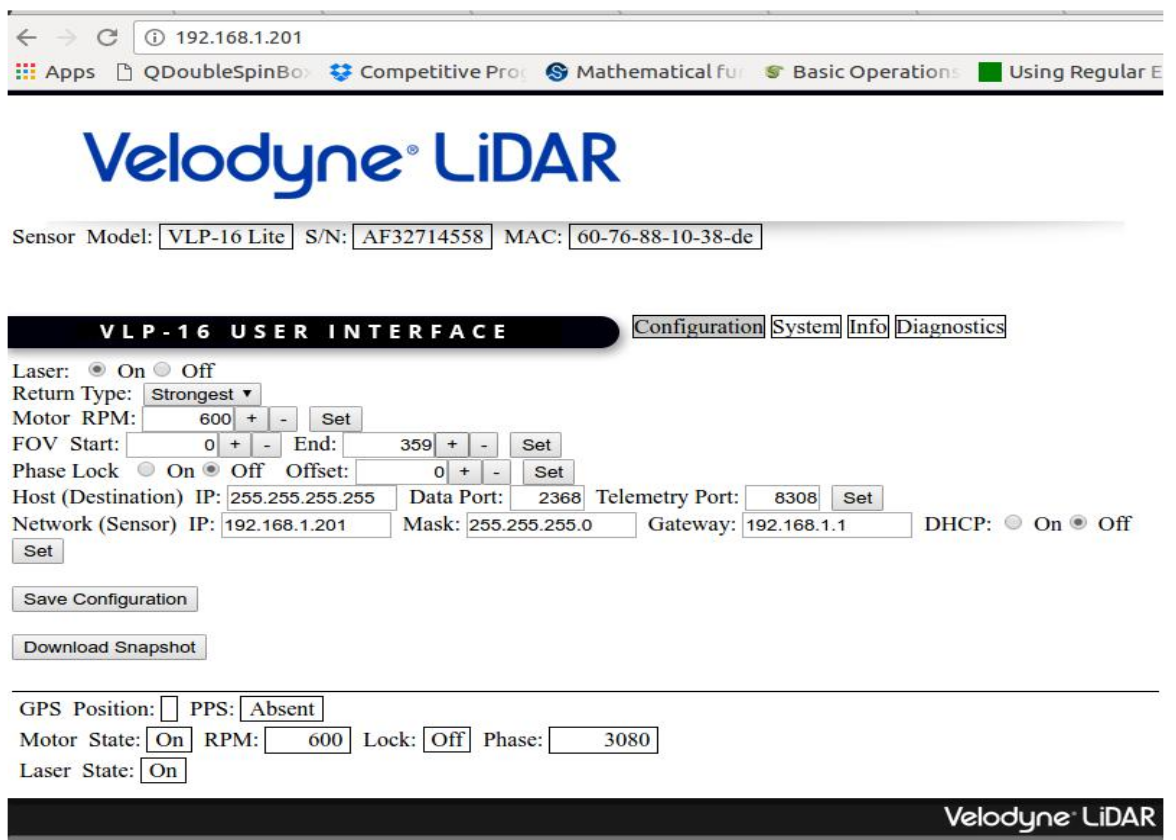
To check the connection open your web browser and access the following sensor’s network address: 192.168.XX.YY. The following page should appear:

Installing ROS dependencies
sudo apt-get install ros-VERSION-velodyne
Installing the VLP16 driver
1. On terminal, inside your ROS workspace, find the “src” folder and execute the following command:
$ cd ~/catkin_ws/src/ && git clone https://github.com/ros-drivers/velodyne.git
2. After that, on terminal, inside your workspace, update all dependecies:
$rosdep install --from-paths src --ignore-src --rosdistro YOURDISTRO -y
3. Then build your workspace:
$ cd ~/catkin_ws/ && catkin_make
4. Now, your Velodyne package is ready to run.
Viewing the Data
- Run the following command on terminal:
$ roslaunch velodyne_pointcloud VLP16_points.launch
- Now, the necessary nodes are running. You can check this with the following command
$ rosnode list
- You'll be able to see the messages being published and subscribed to the following topic:
$ rostopic echo /velodyne_points
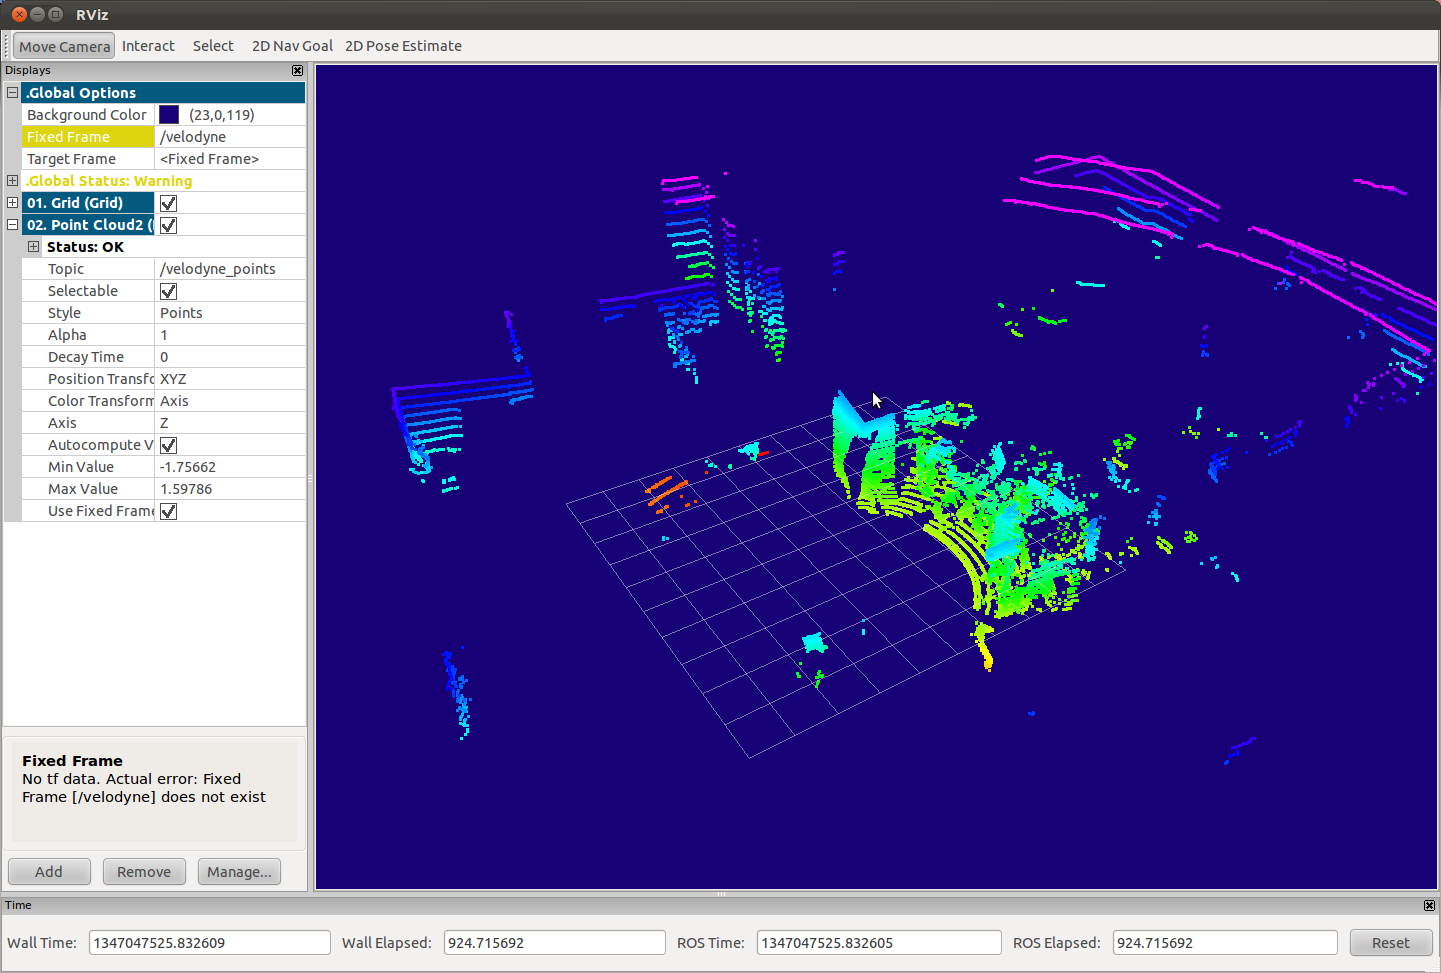
- After That, launch rviz, with the "velodyne" as a fixed frame:
$ rosrun rviz rviz -f velodyne
- In the "displays" panel, click "Add", then select "Point Cloud2", then press "OK".
- In the "Topic" field of the new "Point Cloud2" tab, enter "/velodyne_points".
- Congratulations. Now, your Velodyne is ready to build the "real" world inside your system. Enjoy it.

Troubleshooting
All LIDARs we have seen multicast in the 192.168.YY.XX subnet. If this doesn't work, you can use Wireshark to verify the subnet the packets are being sent to.
- If you have an error about no fixed frame, use: rosrun tf static_transform_publisher 0 0 0 0 0 0 1 map velodyne 10


